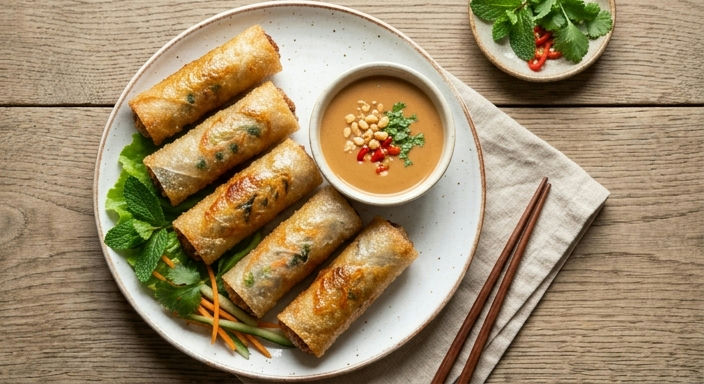
Homemade Fresh Spring Rolls with Peanut Sauce 自製鮮春卷配花生醬
Delicate homemade spring rolls filled with fresh vegetables and crispy textures, wrapped in translucent rice paper and pan-fried until golden. Served with a rich, creamy peanut sauce made from roasted peanuts, soy sauce, and aromatic seasonings. A vegetarian favorite that balances freshness and comfort.
Hong Kong
Vegetarian
Vegetarian
Under 30 min
Nutrition (per serving)
312kcalCalories
10.2gProtein
28.5gCarbs
17.8gFat
4.1gFiber
648mgSodium
Ingredients
- 12 sheets Rice paper wrappers
- 200g Cabbage
- 100g Carrot
- 100g Cucumber
- 50g Fresh mint leaves
- 50g Fresh cilantro
- 100g Roasted peanut butter
- 3tbsp Soy sauce
- 2tbsp Rice vinegar
- 1tbsp Sesame oil
- 1tbsp Sugar
- 2 cloves Garlic
- 1tbsp Lime juice
- 2tbsp Vegetable oil
Steps
- Prepare all vegetables by shredding, julienning, and finely chopping. Arrange on a clean kitchen towel to remove excess moisture.
- In a small bowl, combine peanut butter, soy sauce, rice vinegar, sesame oil, sugar, minced garlic, and lime juice. Stir until smooth and well combined, adding a little water if needed to reach desired consistency.
- Fill a shallow bowl with lukewarm water. Dip one rice paper wrapper briefly in water until pliable, then lay flat on a clean surface.
- Layer a small handful of cabbage, carrot, cucumber, mint, and cilantro in the center of the wrapper, leaving space on all sides.
- Fold the left and right edges of the wrapper inward, then tightly roll the wrapper away from you, tucking in the sides as you roll until fully sealed.
- Repeat steps 3-5 with remaining rice paper wrappers and filling ingredients until all rolls are complete.
- Heat vegetable oil in a large skillet over medium-high heat. Once hot, carefully place spring rolls seam-side down in the pan.
- Fry spring rolls for 3-4 minutes until the bottom is golden and crispy. Carefully flip and fry the other side for another 2-3 minutes until evenly golden.
- Remove spring rolls from the pan and place on a paper towel-lined plate to drain excess oil.
- Arrange the fried spring rolls on a serving plate and place the peanut sauce in a small serving bowl on the side. Serve immediately while still warm.
Related recipes
Cook this with step-by-step timers
EatWhat guides you through each step with built-in timers.
Get EatWhat Free