
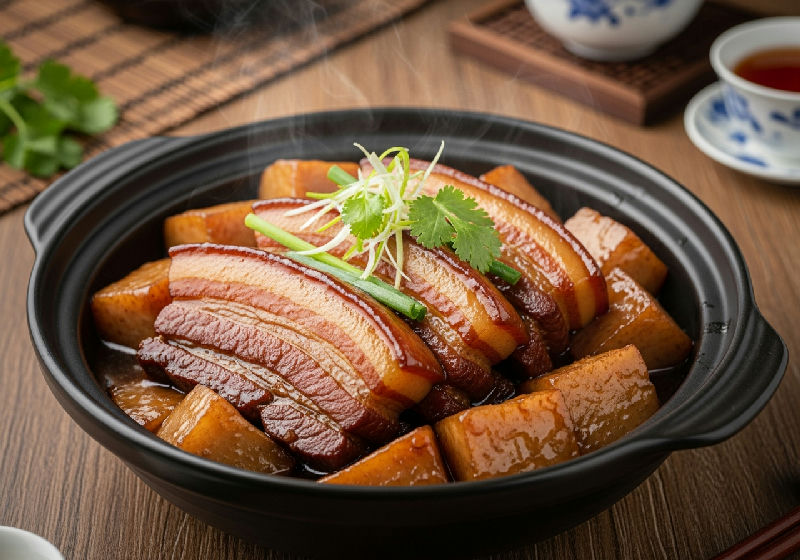
Braised Pork Belly with Taro 芋頭扣肉
Tender pork belly, first fried then slow-braised to perfection, layered with fragrant taro slices and rich fermented bean curd sauce. A comforting and flavorful dish that melts in your mouth.
Hong Kong
Pork
Nutrition (per serving)
742kcalCalories
28.5gProtein
32.8gCarbs
54.2gFat
4.8gFiber
1847mgSodium
Ingredients
- 500g pork belly, skin on
- 500g taro, peeled and sliced into 1cm thick pieces
- 2 tbsp dark soy sauce
- 1 tbsp light soy sauce
- 1 tsp five-spice powder
- 1 tsp sugar
- 1/2 tsp white pepper
- 2 blocks fermented red bean curd (南乳)
- 2 tbsp fermented red bean curd liquid
- 2 cloves garlic, minced
- 3 slices ginger
- 1 star anise
- 1 cinnamon stick
- 200ml hot water or chicken stock
- 1 tbsp rice wine or Shaoxing wine
- 2 tbsp cooking oil
- Salt to taste
- 1/2 tsp sesame oil
- Chopped spring onions for garnish
Steps
- Prepare Pork Belly: Boil pork belly in water for 15 minutes. Remove, prick the skin all over with a fork or skewer, and rub with dark soy sauce. Let it air dry for 15 minutes.
- Fry Pork Belly: Heat cooking oil in a wok. Fry the pork belly skin-side down until golden and crispy (about 5-7 minutes). Remove, drain excess oil, and let cool. Slice into thick pieces.
- Fry Taro: In the same oil (add more if needed), fry the taro slices until lightly golden on both sides (about 2-3 minutes per side). Remove and set aside.
- Prepare Sauce: In a bowl, mash the fermented red bean curd with its liquid, light soy sauce, remaining dark soy sauce, five-spice powder, sugar, white pepper, and rice wine. Mix well.
- Assemble: Arrange the sliced pork belly and taro alternately in a deep, heatproof bowl, with the pork skin-side down.
- Braise: Pour the sauce mixture over the pork and taro. Add minced garlic, ginger slices, star anise, cinnamon stick, and hot water or chicken stock. Steam in a steamer for 60-90 minutes until the pork is very tender.
- Serve: Carefully invert the bowl onto a serving plate. Garnish with sesame oil and chopped spring onions. Serve hot with steamed white rice.
Related recipes

Cook this with step-by-step timers
EatWhat guides you through each step with built-in timers.
Get EatWhat Free